Avenir Typeface Poster

First of all, I used the rectangle tool to make the background red frame. I used the same tool to make the plus shape as well. I used the mouse to rotate the plus shape.

I choose the Avenir typeface to make this post.

I did a little bit of research about the Avenir typeface and put it in a square to align to the plus shape.

I made two cross lines using a pen tool pressing shift key to make them straight, then I used pattern opinion to make the background effect

For this one, I used the same effect for the lines. I choose a letter and went to the stroke panel, checked the dashed line and leave the dash to 12 pt.

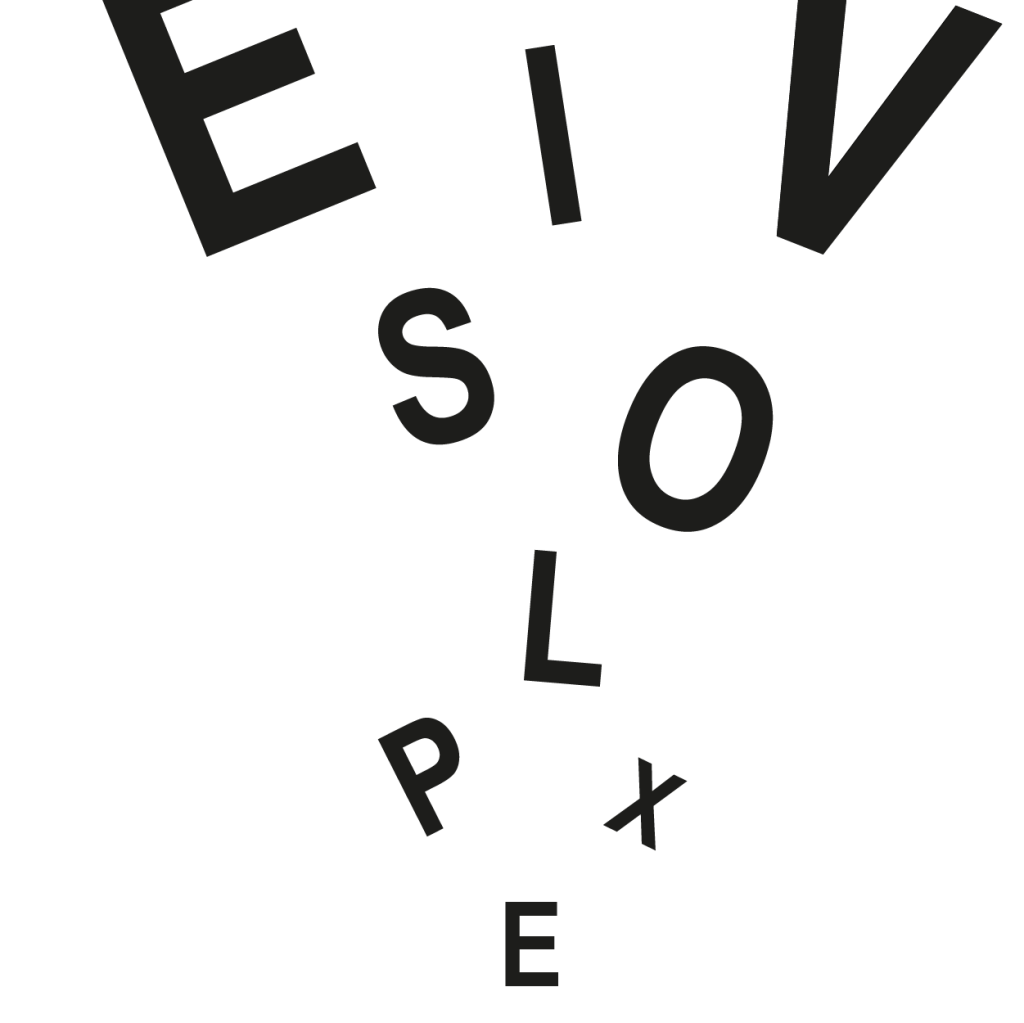
This is my final poster

Mercedes Logo

First of all, I used the ellipse tool to make the circle. I used a start tool to make the green shape manage the three points by pressing the down arrow key, then to make each part longer, I press the command key and dragged it down with the mouse.

For this one, I made 2 copies of the circle and I choose the last bottom. I went to Object > Expand.

It made three layers (Compound Path, Path and Compound Path).

Delete the Path layer and ungroup it.

On this one, I made the gradient of the circle selecting each colour for each part.

I brought the “01” layer to the top. I put the stroke size to 2pt and expanded the stroke.

I opened the transparency panel and changed the Normal to Colour Dodge. I lowered the opacity to 60% then I added the radial blur effect.

For this one, I used the pen tool with the smart guide enabled. I connected three lines inside the star Mercedes shape. Selected the line and the shape and presses the divide option in Pathfinder.

To finish it, I coloured each piece as the tutorial and done!

This is my final image of the Mercedes Logo!

Media Player Icon

I made a new document with 420px X 420px. I used the Ellipse Tool to make a 400 X 400px circle and coloured it using the gradient tool.
I opened the Offset Path with -30px offset.
I selected the inner circle to change the colour to grey with a gradient. I opened Object>Path>Offset to open the offset and reduced the pixel to -20px.
For this one, I just changed the gradient angle to 90%, which created the shadow inside the circle.
I made a triangle shape using the Star Tool. The size is 100px Radius 1 and 50px Radius 2 and point 3. I rotated 90 degrees to the right pressing the Shift key. For the colour, I used the same colour as the outside blue but with the opposite angle to 90 degrees.
For this one, I made the same effect as the RSS logo. I changed the offset pixel to -10px and turned it in the opposite direction.

I draw a rectangle to cut the inner rectangle in half using a pathfinder. I opened the transparency and changed to screen mode which gives a nice shiny effect to the icon.

This is the final image of Media Player Icon.

Illustrator Tutorial 3 – RSS feed logo

Making Gradient.
Window -> Gradient, then add an orange fill that varies from dark to light vertically across the shape. 
Ellipse tool with 16pt black stroke. No fill
I used Direct Selection Tool and selected only the left and bottom points of the circle. Hit delete on the keyboard to trim the circle down to a quarter. 
I copied the first arrow using Command+ C and past using Command+F.
I pressed the shift key and scaled it down to keep everything tight. 
I used rules to scale everything together. The shortcut to show the ruler is Command+R.

I converted the strokes to complete shapes which you can see in the image on the right.

To group all the parts I pressed Command+G
For this task, I used the Ellipse tool to make an around shape on top of the square and I clicked the Intersect Shape Area in the Pathfinder. I Opened the transparency option in window and reduced the opacity to 15%.
This is the final image of RSS feed logo.

Music Poster 2

Filter Blur – Motion Blur
Filter – Stylize – Wind
I added multiple colours using soft brush on new layer.
Filter – Blur – Gaussian Blur
I selected pixels of the rectangle and then invert it to select the whole image except the frame.
Then I selected the Layer 1 and clicked delete.
I scaled the frame size to the greek statue, then I selected the bottom of the statue using rectangle marquee tool to delete it to go behind the frame.